Quick Start
This guide walks you through creating a document, formatting it, and using AI, all in about five minutes.
1. Create a document
Press Cmd+N or click the New document button in the TopBar. A new document opens with the cursor ready. (You can also right-click a folder in the Explorer and choose New Document.)
Start typing. Everything you write is saved as a standard markdown file.
2. Format with markdown
Return renders markdown as you type. Try these:
# Heading- type a hash, then a space, then your heading text**bold**- wrap text in double asterisks*italic*- single asterisks- item- dash and space for a bullet list[ ] task- brackets with a space for a checkbox
The formatting markers disappear as you type, replaced by the visual result. They’re never gone, though - place the cursor right after any formatted text (or at the start of a heading line) and press Backspace once. Instead of deleting anything, this reveals the raw markers for that span so you can edit them. Press Escape or move the cursor away, and the formatting folds back.
You can also select text and use Cmd+B for bold, Cmd+I for italic, and Cmd+E for inline code.
3. Talk to the AI
The Omnibox sits at the bottom of the editor. Click it or press Cmd+K, then type a question or instruction:
- “Summarize this document”
- “What are the key arguments?”
- “Translate the second paragraph to English”
- “Add a conclusion section”
Press Enter. The AI reads your document and responds in the Chat panel on the right. If it suggests edits to your document, they appear as highlighted changes you can accept or reject.
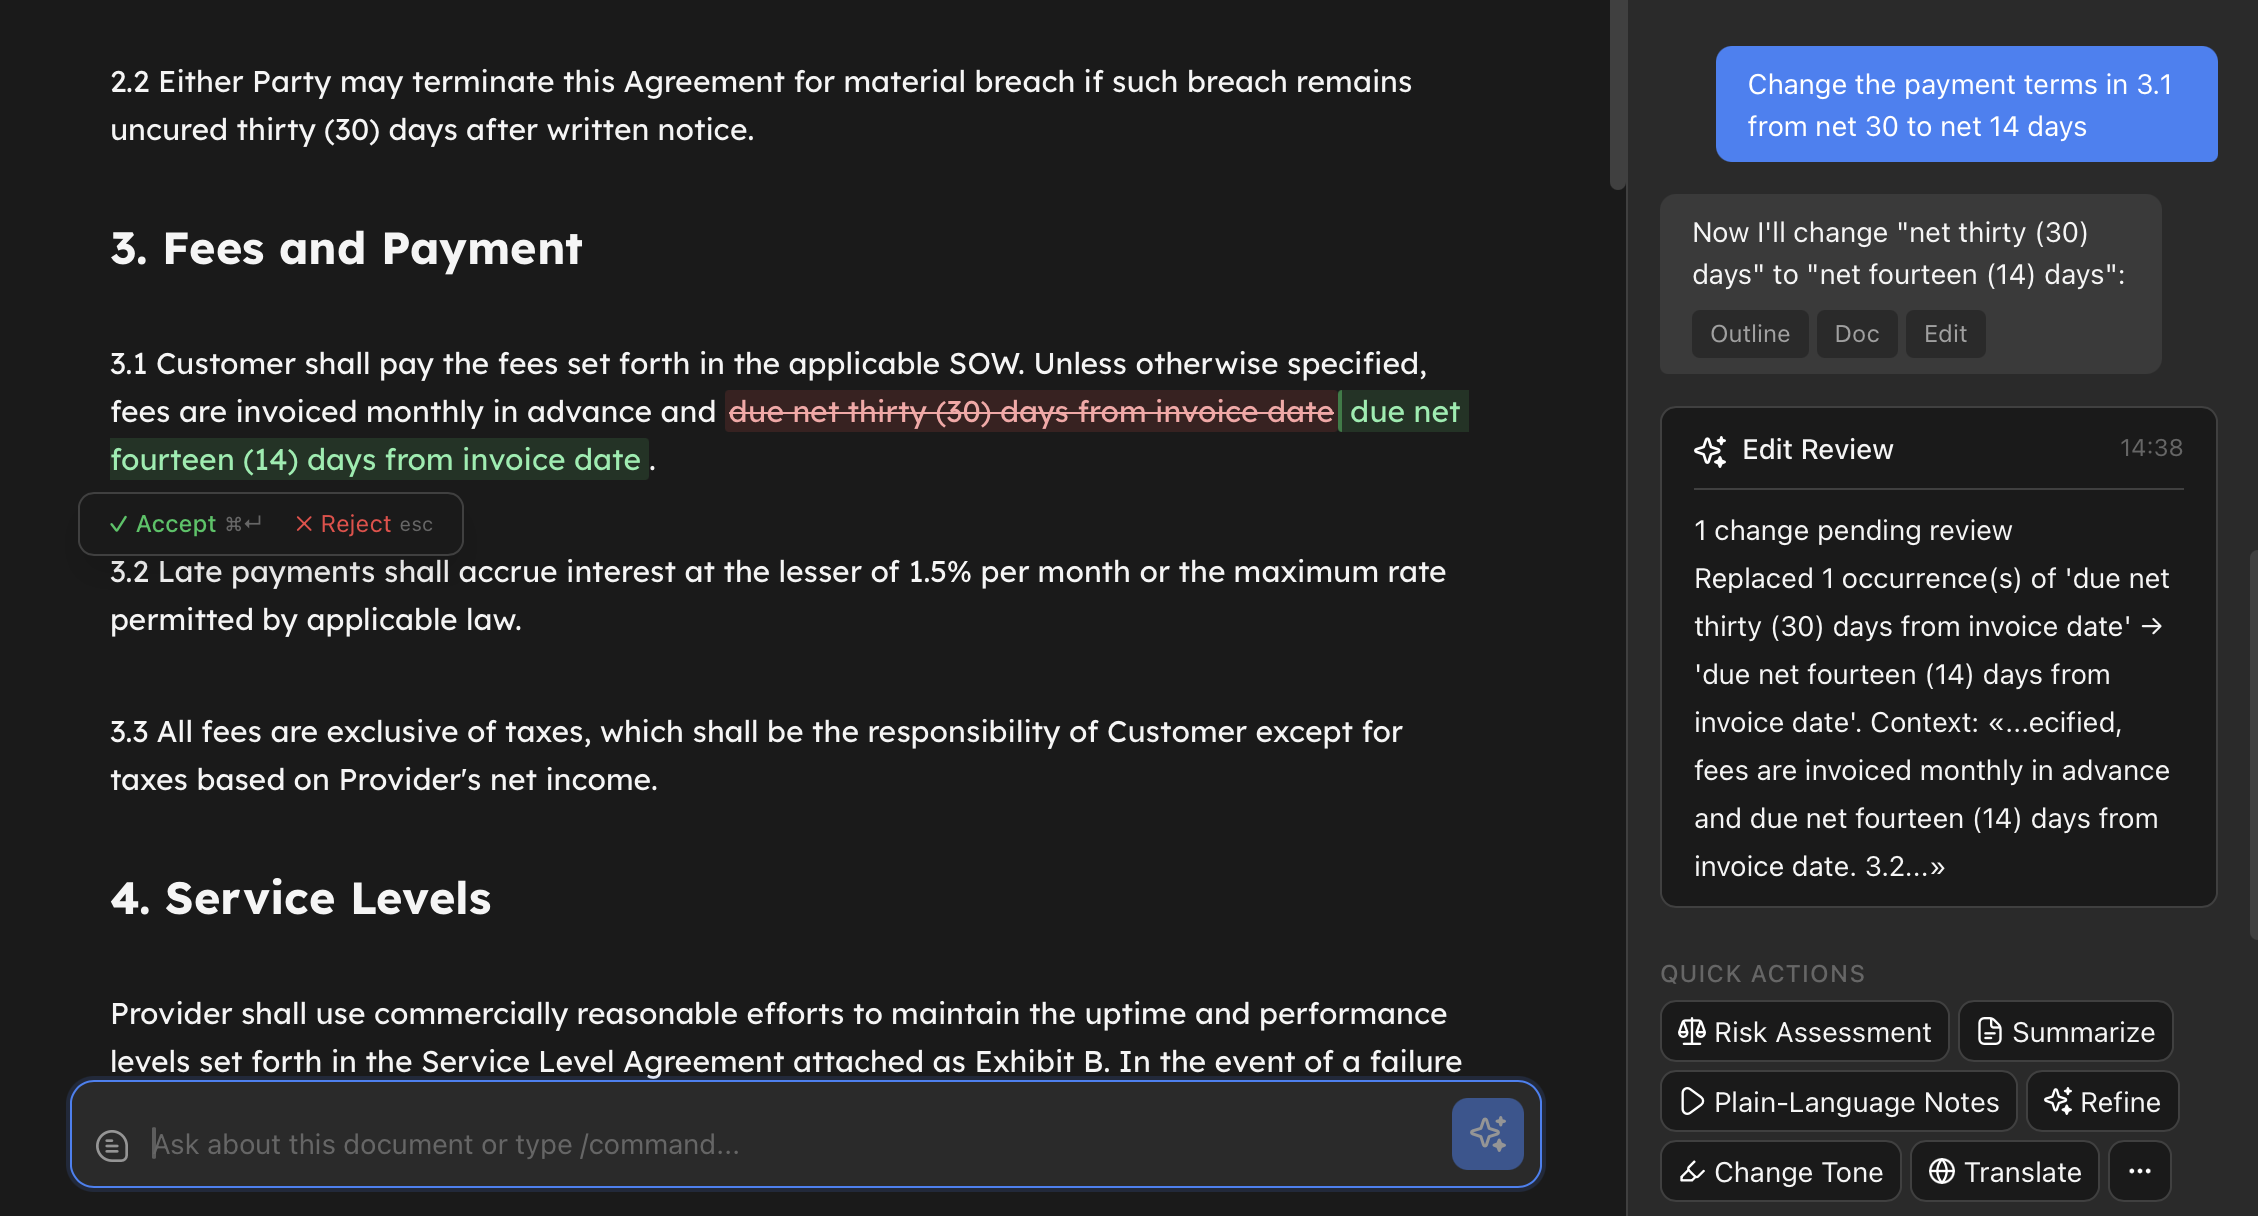
4. Set up AI
Return works with local or cloud AI:
- Local (free): Download a model in Settings → Models - one click, no installation. See Local AI (Built-in Engine) for details.
- Cloud (paid plan): Open Settings (
Cmd+,), go to the AI tab, and switch the mode to Cloud. No additional setup needed, Return handles everything on its servers.
5. Try a Return
Returns are reusable AI analysis templates. You’ll find the Quick Actions section at the bottom of the Chat panel on the right. Click one to run it on your current document.
Returns can annotate your text with highlights, assess sections with traffic-light indicators (green, yellow, red), or produce structured analysis.
See also: Composing Returns - combine several Returns into a single Quick Action that runs them in sequence.
6. Save and export
Your document saves with Cmd+S. To export, type /export in the Omnibox or go to the TopBar menu, where you can export as PDF or HTML.
What’s next
- Interface Overview - learn where everything is
- Keyboard Shortcuts - speed up your workflow
- AI in Return - understand how AI features work together